WebAssembly支持的编程语言
本文中示例的运行环境为MacOS Monterey 12.4。
1. 总览
各语言对WebAssembly支持情况(是否可编译成WebAssembly)一览:
| Language | Browser | WASI |
|---|---|---|
| C | ✅ | ✅ |
| C++ | ✅ | ✅ |
| Rust | ✅ | ✅ |
| TinyGo | ✅ | ✅ |
| Go | ✅ | ❌ |
| JavaScript | ⏳ | ⏳ |
| Python | ⏳ | ✅ |
| Java | ✅ | ❌ |
| C# and .NET | ✅ | ✅ |
| Ruby | ✅ | ✅ |
| Swift | ✅ | ✅ |
| R | ✅ | ❌ |
| Kotlin | ✅ | ⏳ |
参考:https://www.fermyon.com/wasm-languages/webassembly-language-support
Fermyon提供了RedMonk’s ranking中排名前20的编程语言对WebAssembly的支持情况。
让代码在WebAsssembly runtime中运行的方法大致有两种:
- 直接将源代码编译成WebAssembly
- 如:C,Rust,AssmeblyScript
- 将解释器(Interpreter)编译成WebAssembly,然后将源代码传入解释器
- 这种方法一般用于脚本语言(scripting language),如Ruby,JavaScript,Python
本文中将对其中几种做具体介绍。
2. WASM运行时(Runtimes)
在编译成.wasm文件后,需要一个runtime来运行它,可选的runtime有很多,这里我们安装3种:wasmtime,wasmer,wasmedge。
2.1. Wasmtime
2.1.1. 简介
Wasmtime是由 bytecodealliance开源的WebAssembly独立运行时,具备以下特点:
- 快:可以快速地在运行时或者提前生成高质量机器码
- 安全:实例间的内存隔离、安全的Rust API等
- 可配置:丰富的API支持,提供很多配置选项,如限制CPU和Memory消耗量等。Wasmtime可以在小型环境中运行,也可以在有许多并发实例的大型服务器中运行
- WASI:使用WASI标准,提供丰富的API来与主机交互
- 符合标准:通过了官方WebAssembly测试套件,实现了WebAssembly的官方C API
2.1.2. 目前支持的语言
Rust: the wasmtime crateC: the wasm.h, wasi.h, and wasmtime.h headers or use wasmtime Conan packageC++: the wasmtime-cpp repository or use wasmtime-cpp Conan packagePython: the wasmtime PyPI package.NET: the Wasmtime NuGet packageGo: the wasmtime-go repository
2.1.3. 安装
Linux和macOS环境,执行:
1 | curl https://wasmtime.dev/install.sh -sSf | bash |
执行结果如下:
关闭当前Terminal,重新打开一个Terminal,执行:
1 | wasmtime -V |
可以看到版本号:
2.2. Wasmer
2.2.1. 简介
Wasmer提供基于WebAssembly的超轻量级容器,其可以在任何地方运行:从桌面到云、以及IoT设备,并且也能嵌入到其它编程语言中。
特性:
- 快速又安全:Wasmer在完全沙盒化的环境中以“接近本机”的速度运行WebAssembly
- 可插拔:Wasmer可以根据你的需求支持不同的编译框架 (LLVM,Cranelift ……)
- 通用的:你可以在任何平台(macOS,Linux,Windows) 和芯片组运行Wasmer
- 符合标准:运行时通过了官方WebAssembly测试集,支持WASI和Emscripten
2.2.2. 目前支持的语言
Wasmer runtime可以作为library嵌入不同的编程语言中:
| Language | Package |
|---|---|
| Rust | wasmer Rust crate |
| C | wasm.h header |
| C++ | wasm.hh header |
| C# | WasmerSharp NuGet package |
| D | wasmer Dub package |
| Python | wasmer PyPI package |
| JS | @wasmerio NPM packages |
| Go | wasmer Go package |
| PHP | wasm PECL package |
| Ruby | wasmer Ruby Gem |
| Java | wasmer/wasmer-jni Bintray package |
| Elixir | wasmex hex package |
| R | no published package |
| Postgres | no published package |
| Swift | no published package |
| Zig | no published package |
| Dart | wasm pub package |
| Crystal | no published package |
| Lisp | no published package |
| Julia | no published package |
| VLang | no published package |
2.2.3. 安装
1 | curl https://get.wasmer.io -sSfL | sh |
执行结果如下: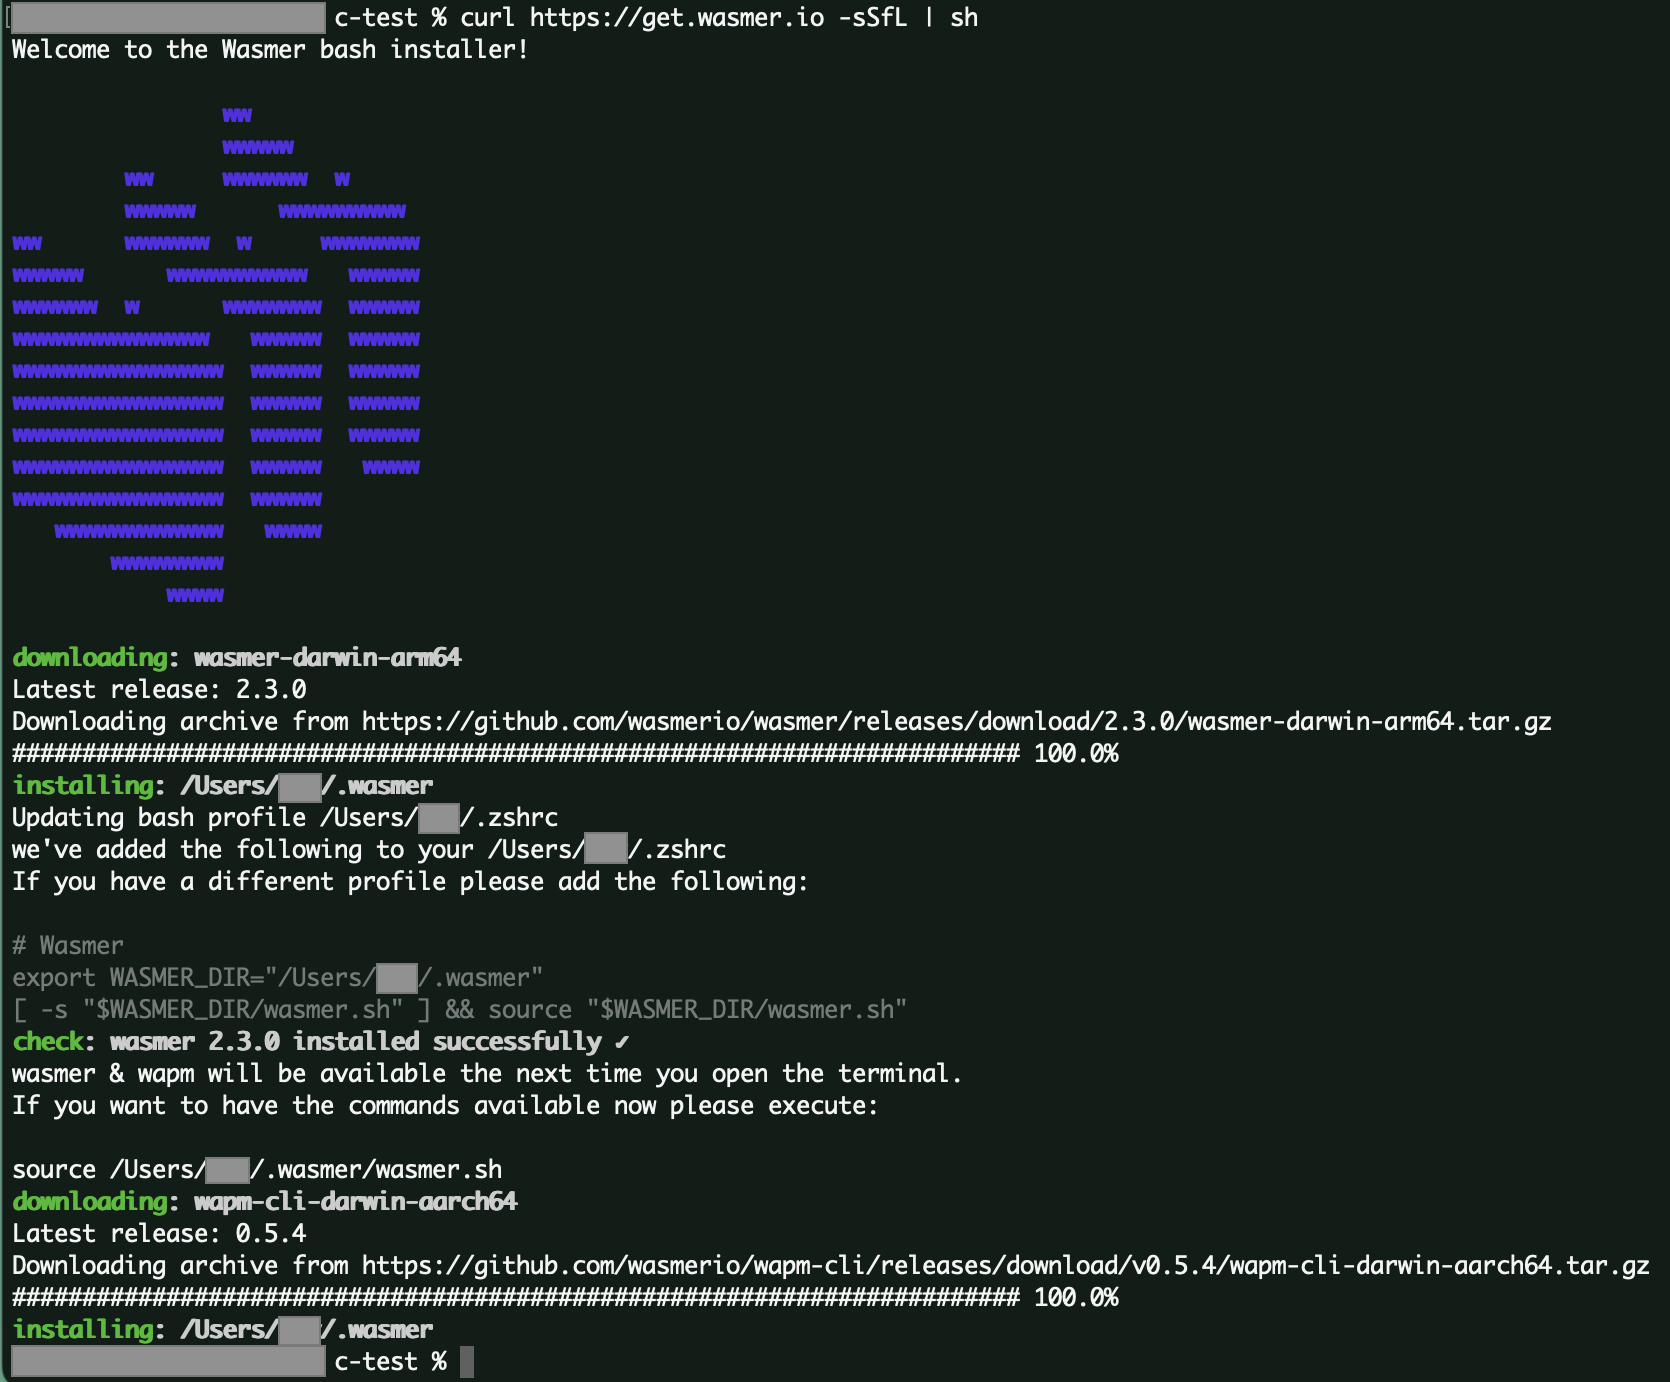
关闭当前Terminal,重新打开一个Terminal,执行:
1 | wasmer -V |
可以看到版本号:
2.3. WasmEdge
2.3.1. 简介
WasmEdge(之前名为 SSVM)是为边缘计算优化的轻量级、高性能、可扩展的WebAssembly(Wasm)虚拟机,可用于云原生、边缘和去中心化的应用。WasmEdge是目前市场上最快的Wasm虚拟机,是由 CNCF(Cloud Native Computing Foundation 云原生计算基金会)托管的官方沙箱项目。其应用场景包括 serverless apps、嵌入式函数、微服务、智能合约和IoT设备。
WasmEdge Runtime为其执行的Wasm字节码程序提供了一个有良好定义的执行沙箱,为操作系统资源(例如,文件系统、sockets、环境变量、进程)和内存空间提供隔离和保护。WasmEdge 最重要的用例是作为软件产品(例如,SaaS、软件定义的汽车、边缘节点,甚至区块链节点)中的插件安全地执行用户定义或社区贡献的代码。它使第三方开发者、软件供应商和社区成员能够扩展和定制软件产品。
特性:
- WasmEdge可以运行从 C/C++、Rust、Swift、AssemblyScript 或 Kotlin 源代码编译的标准WebAssembly字节码程序
- 它还通过嵌入式QuickJS引擎运行JavaScript
- WasmEdge支持所有标准的WebAssembly特性和提议的扩展
- 它还支持许多为云原生和边缘计算用途量身定制的扩展(例如,WasmEdge Tensorflow 扩展)
WebAssembly的WasmEdge扩展通常作为Rust SDK或JavaScript APIs提供给开发者。
2.3.2. 目前支持的语言
- C/C++
- Rust
- Swift
- AssemblyScript
- Kotlin
- JavaScript
2.3.3. 安装
先安装brew(macOS的话安装homebrew):见 MacOS M1安装Homebrew 。
安装llvm
1
brew install llvm
这里会下载一系列工具,安装过程可能会很慢。
安装完成后,将llvm添加到PATH:
1
echo 'export PATH="/opt/homebrew/opt/llvm/bin:$PATH"' >> ~/.zshrc
执行上述命令后,打开
~/.zshrc可以看到最后一行为export PATH="/opt/homebrew/opt/llvm/bin:$PATH",说明llvm已经被添加到PATH中了。安装WasmEdge
1
curl -sSf https://raw.githubusercontent.com/WasmEdge/WasmEdge/master/utils/install.sh | bash
执行结果如下:

检查WasmEdge是否已成功安装
关闭当前Terminal,重新打开一个Terminal,执行:1
wasmedge -v
如果出现提示:“无法打开wasmedge,因为Apple无法检查其是否包含恶意软件”,打开“系统偏好设置 -> 安全性与隐私 -> 通用”,选择“仍然允许”:

然后运行上面命令,可以看到WasmEdge的版本号:

3. C:将C/C++编译成WebAssembly的方法
C is one of the best supported WebAssembly languages.
3.1. 方法一:WASI SDK 和 Clang/LLVM
下载
wasi-sdk
在wasi-sdk releases page找到相应操作系统的下载包,复制下载链接,然后执行:1
curl -O -sSL https://github.com/WebAssembly/wasi-sdk/releases/download/wasi-sdk-16/wasi-sdk-16.0-macos.tar.gz
解压文件:
1
tar xf wasi-sdk-16.0-macos.tar.gz
运行结果:

创建
hello.c文件1
2
3
4
5
int main() {
printf("Hello, World\n");
}使用
wasi-sdk中的clang将C编译成WASM1
./wasi-sdk-16.0/bin/clang --sysroot wasi-sdk-16.0/share/wasi-sysroot/ hello.c -o hello.wasm
运行结果:

运行
.wasm文件1
2
3
4
5
6
7
8# 使用wasmer运行.wasm
wasmer hello.wasm
# 使用wasmtime运行.wasm
wasmtime hello.wasm
# 使用wasmedge运行.wasm
wasmedge hello.wasm运行结果:
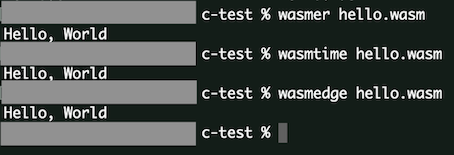
3.2. 方法二:Emscripten
C/C++可以用Emscripten编译成WebAssembly。
3.2.1. 将C编译成WebAssembly
下载Emscripten:https://emscripten.org/docs/getting_started/downloads.html
使用emsdk安装Emscripten:1
2
3
4
5
6
7
8
9
10
11
12
13
14
15
16
17# Get the emsdk repo
git clone https://github.com/emscripten-core/emsdk.git
# Enter that directory
cd emsdk
# Fetch the latest version of the emsdk (not needed the first time you clone)
git pull
# Download and install the latest SDK tools.
./emsdk install latest
# Make the "latest" SDK "active" for the current user. (writes .emscripten file)
./emsdk activate latest
# Activate PATH and other environment variables in the current terminal
source ./emsdk_env.sh使用
emcc生成.wasm
回到hello.c所在路径,执行:1
emcc hello.c -o hello.wasm
执行结果:

运行
.wasm1
2
3
4
5
6
7
8# 使用wasmer运行.wasm
wasmer hello.wasm
# 使用wasmtime运行.wasm
wasmtime hello.wasm
# 使用wasmedge运行.wasm
wasmedge hello.wasm运行结果与使用WASI SDK 和 Clang/LLVM时相同。
3.2.2. 生成HTML和JavaScript
另外,Emscripten还可以用来生成所有用于浏览器环境的代码。
使用上面简单的
hello.c文件生成HTML1
emcc hello.c -o hello.html
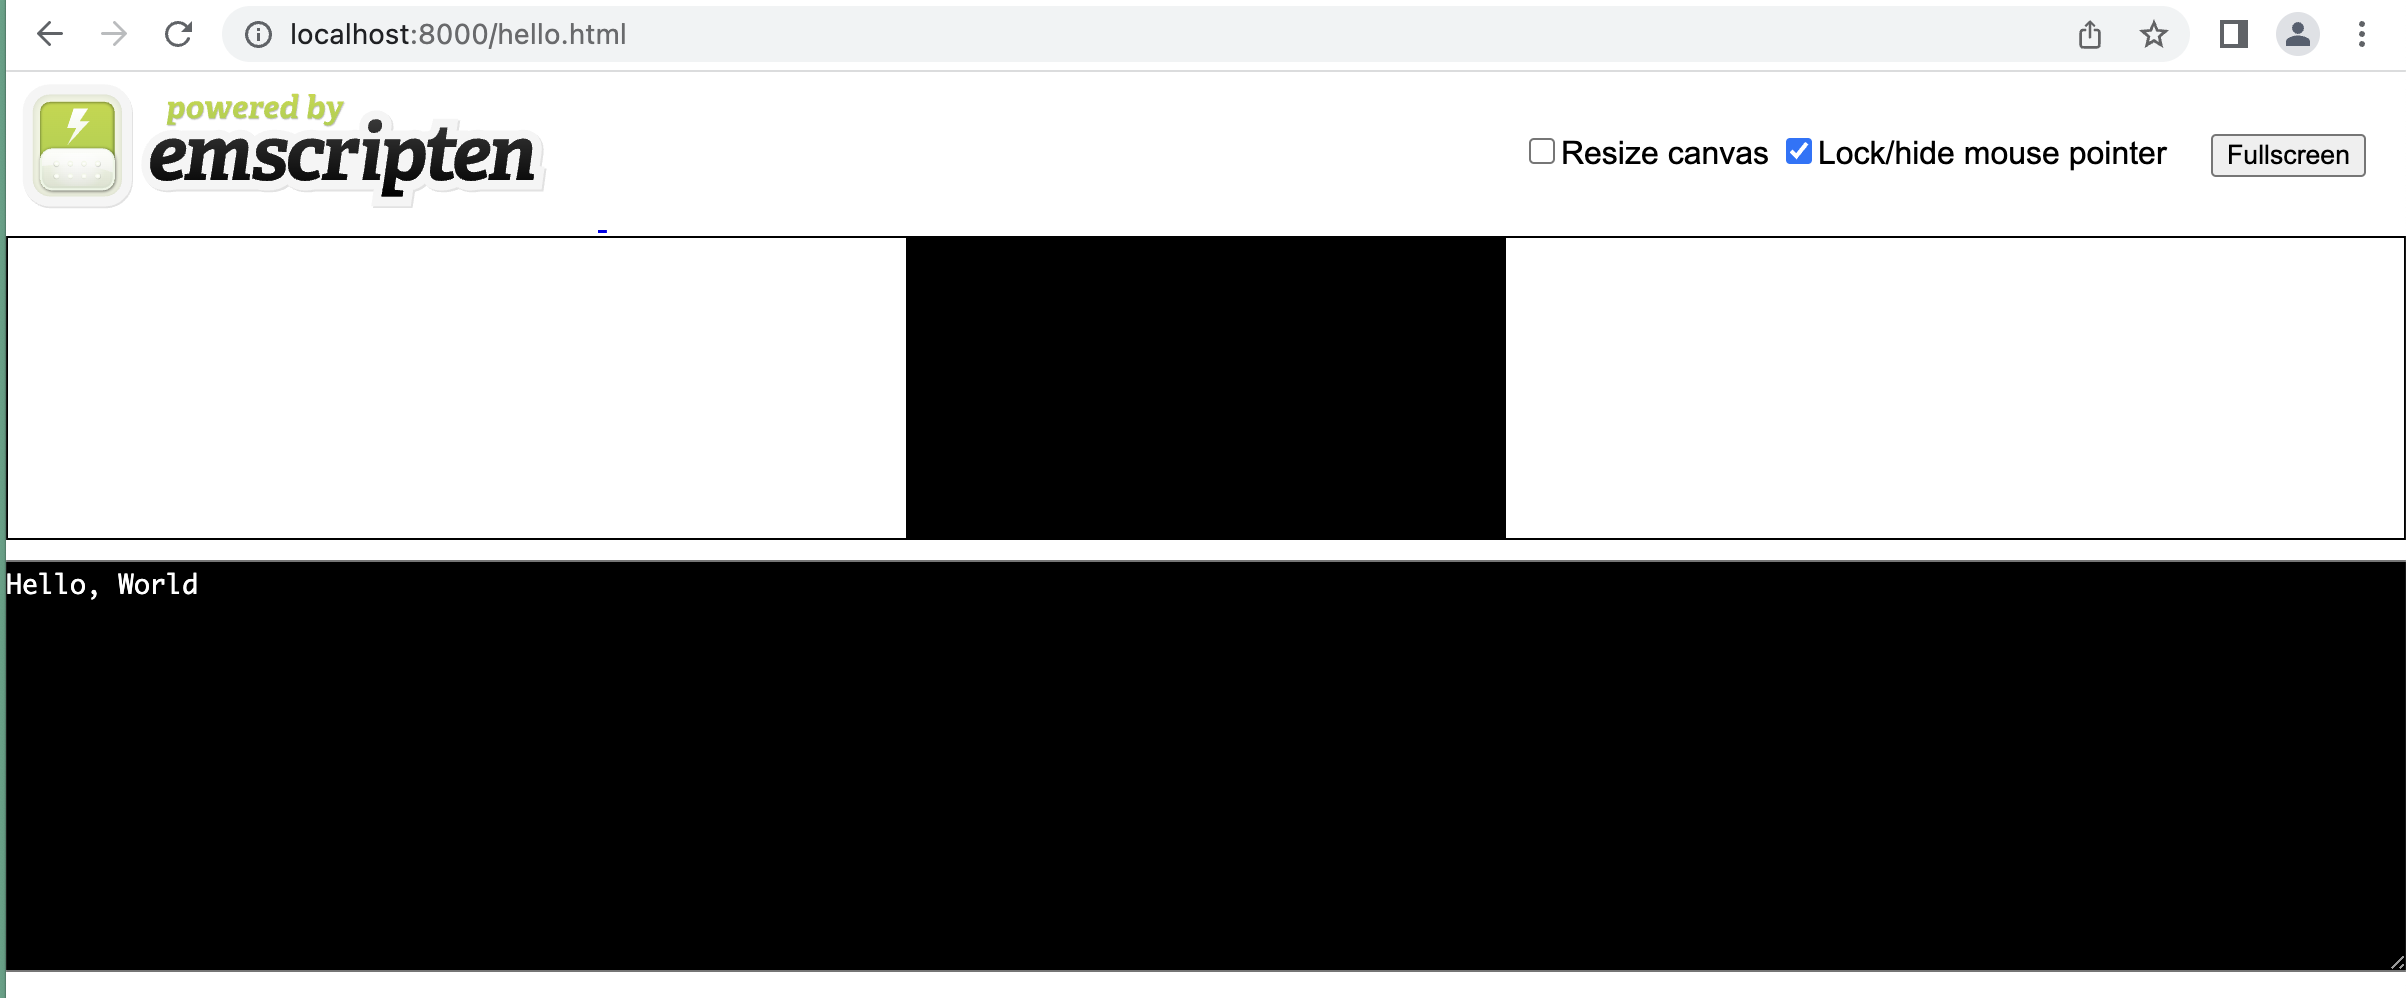
-o hello.html表示我想让Emscripten生成一个用于运行我们写的代码的HTML页面,以及用来编译和初始化wasm module的JavaScript glue code,这样生成的wasm module就可以在浏览器中运行了。执行结果:

生成了3个文件:
hello.wasm:二进制wasm modulehello.js:包含glue code的JavaScript文件,用于native C functions与JavaScript/wasm之间的沟通hello.html:加载、编译、初始化你的wasm module的HTML文件,在浏览器上显示它的输出
启动一个本地的HTTP Server
安装python,在含有hello.html的路径下执行:1
python3 -m http.server
这个命令会在本地启动一个web server,端口号为
8000。运行HTML文件
访问localhost:8000:
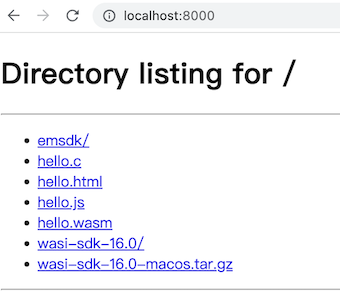
可以看到当前路径下的文件,选择hello.html。,可以看到(Chrome显示结果):
4. Rust
Rust is probably the best supported language of the WebAssembly ecosystem.
WebAssembly and WASI are officially supported by the Rust project.
4.1. 安装Rust
1 | curl https://sh.rustup.rs -sSf | sh |
安装后查看版本号:
1 | rustc --version |
4.2. 将Rust编译成WebAssembly
4.2.1. 创建Rust程序
新建路径
hello/src1
mkdir -p hello/src
在
hello/src下新建文件main.rs,内容如下:1
2
3fn main() {
println!("Hello, world!");
}在
hello下创建文件Cargo.toml,内容如下:1
2
3
4
5
6[package]
name = "hello"
version = "0.1.0"
edition = "2021"
[dependencies]
4.4.2. 将Rust编译成WebAssembly
在hello路径下:
使用
rustup添加wasm32-wasi编译器:1
rustup target add wasm32-wasi
执行:
1
cargo build --target wasm32-wasi --release
target将编译目标设置为wasm32-wasirelease虽然不是必须的,但加上它会大大减小输出的.wasm的大小
生成的
.wasm文件会被写入target/wasm32-wasi/release路径。
4.4.3. 执行.wasm
1 | # 使用wasmer运行.wasm |
3种runtimes均可以执行生成的hello.wasm,均输出“Hello, world!”。
5. Go:TinyGo编译成WebAssembly
5.1. 简介
Go在早期就加入了WebAssembly,在生成常规的build targets的同时,也可以生成wasm32。但核心的Go工具已经落后了,目前领先的是TinyGo。
- TinyGo通过创建一个基于LLVM的新编译器,将Go语言带入嵌入式系统和现代web中
- 支持在超过85个不同的微控制器主板上编译和运行TinyGo
- TinyGo还可以生成WebAssembly代码,大小非常紧凑,让你能为Web浏览器以及支持WASI接口的服务器和边缘计算环境编译程序
可用的实现:
- 支持基于浏览器的WebAssembly
- TinyGo支持用
wasm32-wasi作为build target - Elements compiler还可以支持编译面向浏览器的WASM
Golang可以直接编译成WebAssembly,但即便是最新版本(Go version 1.18)也仍然不支持WASI。如果想要编译成有WASI支持的WebAsssembly,需要使用TinyGo,TinyGo可以将大部分的Go程序编译成具有WASI支持的WASM。
5.2. 优缺点
优点:
- TinyGo效果非常好
持中立态度:
- 得到的二进制结果在大约300k,但可以迅速攀升
缺点:
- 上游(主线)Go不支持WASI
- TinyGo仍缺少Go的功能(主要是基于反射的)
5.3. 安装Go和TinyGo
安装Go:参考 安装Go 。
安装TinyGo
1
2brew tap tinygo-org/tools
brew install tinygo安装成功后,测试TinyGo版本:
1
tinygo version
如果显示版本号,则安装成功。

5.4. TinyGo编译成wasm
5.4.1. 创建Go程序
创建
hello路径1
mkdir hello
进入
hello路径,执行下面指令来创建go.mod1
2cd hello
go mod init hello执行上面指令后,在当前路径下会生成
go.mod文件,文件内容如下图红框中所示: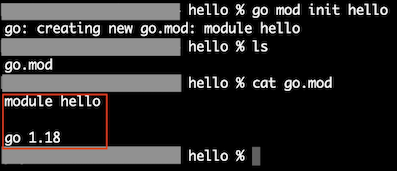
创建Go程序
main.go1
2
3
4
5
6
7package main
import "fmt"
func main() {
fmt.Println("Hello World!")
}
5.4.2. 用TinyGo将Go程序编译成WebAssembly
在编译时,我们要使用的是TinyGo而不是Go。
1 | tinygo build -wasm-abi=generic -target=wasi -gc=leaking -o main.wasm main.go |
可以看到,在执行上面命令后,当前路径下生成了main.wasm文件:
5.4.3. 执行.wasm
1 | # 使用wasmer运行.wasm |
均会输出“Hello World!”。
5.5. 用Go编译成.wasm - Only Executed by JS Engine
执行:
1 | GOOS=js GOARCH=wasm go build -o main.wasm |
可以看到当前路径下生成了main.wasm文件。但使用wasmer、wasmtime、wasmedge来运行它时,却会发生错误: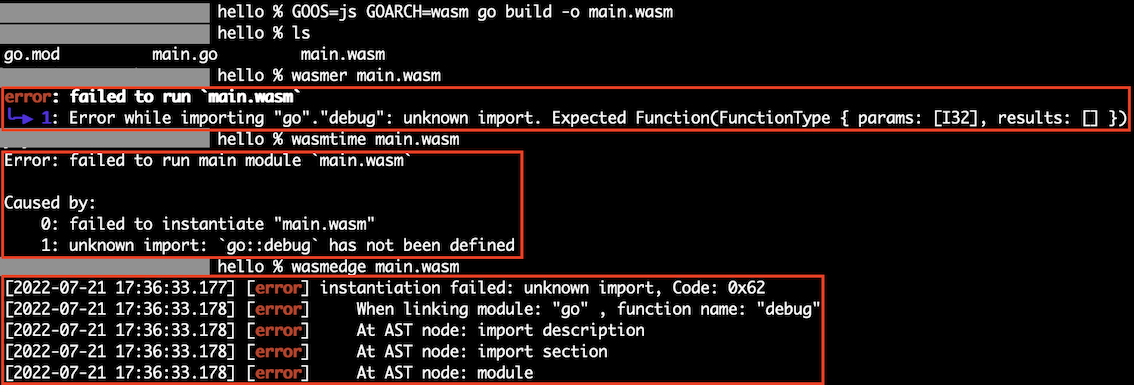
这是因为Go目前只支持JavaScript引擎,不支持WASI。
5.5.1. JavaScript Support File
想要在浏览器中运行这个wasm module,需要一个JavaScript support文件wasm_exec.js,将这个文件从GOROOT拷贝到当前路径:
1 | cp "$(go env GOROOT)/misc/wasm/wasm_exec.js" . |
5.5.2. index.html File
我们还需要一个将wasm module和JavaScript文件连接在一起的HTML文件:
1 | <html> |
将
hello文件夹拷贝到$GOPATH/src下。如果没有设置,$GOPATH一般为~/go。1
2
3
4
5# 如果$GOPATH下不存在`src`文件夹,创建这个文件夹
mkdir ~/go/src
# 拷贝`hello`文件夹
cp -r hello ~/go/src/安装goexec
1
go get -u github.com/shurcooL/goexec
可以看到
$GOPATH/bin/下有可执行文件goexec。启动一个Http Server
转到$GOPATH/src/hello路径下,在本地8080端口启动一个Http Server:1
goexec 'http.ListenAndServe(`:8080`, http.FileServer(http.Dir(`.`)))'
5.5.4. 查看输出
打开浏览器,访问http://localhost:8080/index.html(Chrome显示结果):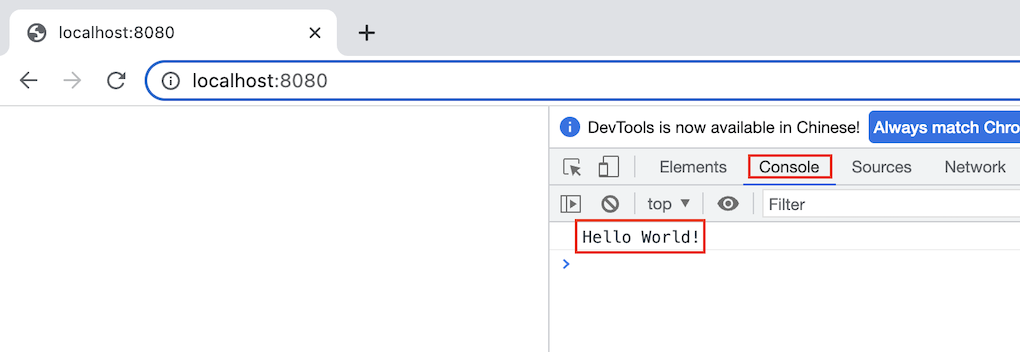
5.5.5. 使用Node.js运行.wasm
除了浏览器之外,Node.js也可以执行Go编译的wasm module。详情见:https://github.com/golang/go/wiki/WebAssembly#executing-webassembly-with-nodejs
6. JavaScript
将JavaScript编译成WebAssembly和使用JavaScript与WebAssembly通信是不同的。这里介绍的是如何把JavaScript编译成WebAssembly。
6.1. 简介
将JavaScript编译成WebAssembly:
- Javy:Shopify开发的工具,基于QuickJS
在WebAssembly中运行JavaScript:
6.2. Javy:将JavaScript编译成wasm
Javy是JavaScript转换成WebAssembly的工具链。JavaScript代码可以在嵌入了JavaScript运行时的WebAssembly中运行。
6.2.1. 安装Javy
- 克隆Javy的git仓库 然后进入
1
git clone https://github.com/Shopify/javy.git
javy路径:1
cd javy
- 安装rustup
1
curl https://sh.rustup.rs -sSf | sh
- 安装stable rust
1
rustup install stable && rustup default stable
- 安装
wasm32-wasi1
rustup target add wasm32-wasi
- 安装
cmake1
brew install cmake
- 安装
Rosetta 2。如果使用的是Apple芯片,使用命令:1
softwareupdate --install-rosetta
- 下载
wasi-sdk1
make download-wasi-sdk
- 安装
wasmtime-cli执行后会在1
cargo install wasmtime-cli
~/.cargo/bin/下安装wasmtime。 - 安装
cargo-wasi执行后会在1
cargo install cargo-wasi
~/.cargo/bin/下安装cargo-wasi。 - 生成javy可执行文件
执行:这个步骤可能耗时比较长。1
2
3
4make
# 或者下面的指令:global installation of javy
make && cargo install --path crates/cli
结束后,在路径target/release下可以看到javy可执行文件:
6.2.2. 创建JavaScript文件index.js
文件内容:
1 | //Simple Program to calculate Fibonacci Sequence of an Integer Input |
6.2.3. 用javy将JavaScript编译成WebAssembly
1 | ./target/release/javy index.js -o index.wasm |
编译结果:
6.2.4. 测试.wasm
1 | # 使用wasmtime运行index.wasm |
运行结果: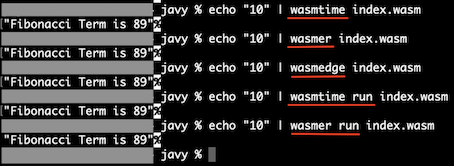
6.3. WasmEdge:用WebAssembly运行JavaScript
将QuickJS JavaScript Interpreter编译成WebAssembly,WasmEdge可以用这个wasm module来运行JavaScript。
6.3.1. 将QuickJS编译为WebAssembly
- 克隆
wasmedge-quickjs仓库进入1
git clone https://github.com/second-state/wasmedge-quickjs
wasmedge-quickjs路径:1
cd wasmedge-quickjs
- 安装rust wasm32-wasi target
1
rustup target add wasm32-wasi
- 构建QuickJS JavaScripter Interpreter 在
1
cargo build --target wasm32-wasi --release
target/wasm32-wasi/release/路径下可以找到编译成wasm的wasmedge_quickjs.wasm:
6.3.2. 运行JavaScript
使用example_js/hello.js测试刚刚生成的wasmedge_quickjs.wasm是否能运行JavaScript:
1 | wasmedge --dir .:. target/wasm32-wasi/release/wasmedge_quickjs.wasm example_js/hello.js WasmEdge Runtime |
运行结果:
7. Python
当一段Python代码在本地runtime中执行的时候,源代码是在运行时被加载和执行的,不需要编译。对于WebAssembly,这个过程也是类似的。我们直接把python.wasm加载到WebAssembly runtime中,然后一行行运行脚本。
8. Java
所有现存的(2022-07-21)将Java编译成WebAssembly的实现都是面向浏览器的,旨在让开发者编写Java程序后从JavaScript链接到它。
现有的实现:
- Bytecoder project: 将Java代码交叉编译成可在浏览器中运行的WebAssembly
- TeaVM project:对基于浏览器的WebAssembly有实验性的支持
- JWebAssembly:WebAssembly专用编译器,可以将任何JVM字节码翻译成WebAssembly,包括Groovy,Clojure,JRuby,Jython,Kotlin,Scala。它也是以浏览器为中心的
- CheerpJ:还包含对用户界面(UI)的处理
8.1. Bytecoder测试
提供将JVM字节码编译成JavaScript或WebAssembly的功能。
8.1.1. 获取bytecoder-cli
1 | wget https://repo.maven.apache.org/maven2/de/mirkosertic/bytecoder/bytecoder-cli/2021-11-02/bytecoder-cli-2021-11-02-executable.jar |
8.1.2. 新建Java文件
1 | mkdir bytecodertest |
将下面代码拷贝到HelloWorld.java中:
1 | package bytecodertest; |
8.1.3. 将Java源文件编译成.class文件
1 | javac HelloWorld.java |
目前的目录结构是:
1 | bytecoder-cli-2021-11-02-executable.jar |
8.1.4. 用bytecoder-cli将bytecodertest.HelloWorld.class编译成JavaScript
进入bytecodertest的上级目录,然后执行:
1 | java -jar bytecoder-cli-2021-11-02-executable.jar -classpath=. -mainclass=bytecodertest.HelloWorld -builddirectory=. -backend=js -minify=false |
运行后会生成bytecoder.js文件,如下图:
8.1.5. 创建HTML文件index.html
1 | <html> |
用浏览器打开这个文件就可以看到“Hello World!”。Chrome显示结果:
8.1.6. 用bytecoder-cli将bytecodertest.HelloWorld.class编译成WebAssembly
1 | java -jar bytecoder-cli-2021-11-02-executable.jar -classpath=. -mainclass=bytecodertest.HelloWorld -builddirectory=. -backend=wasm -minify=false |
将index.html改为如下内容:
1 | <html> |
然后用浏览器打开html文件。
用Chrome打开后显示结果:
改用Firefox打开,同样出现CORS policy的问题,解决方法:
- 打开Firefox,在地址栏输入
about:config - 点击“接受风险并继续”后进入页面
- 搜索
security.fileuri.strict_origin_policy,设置该项为false
再次用Firefox打开index.html,就可以看到Hello World!了: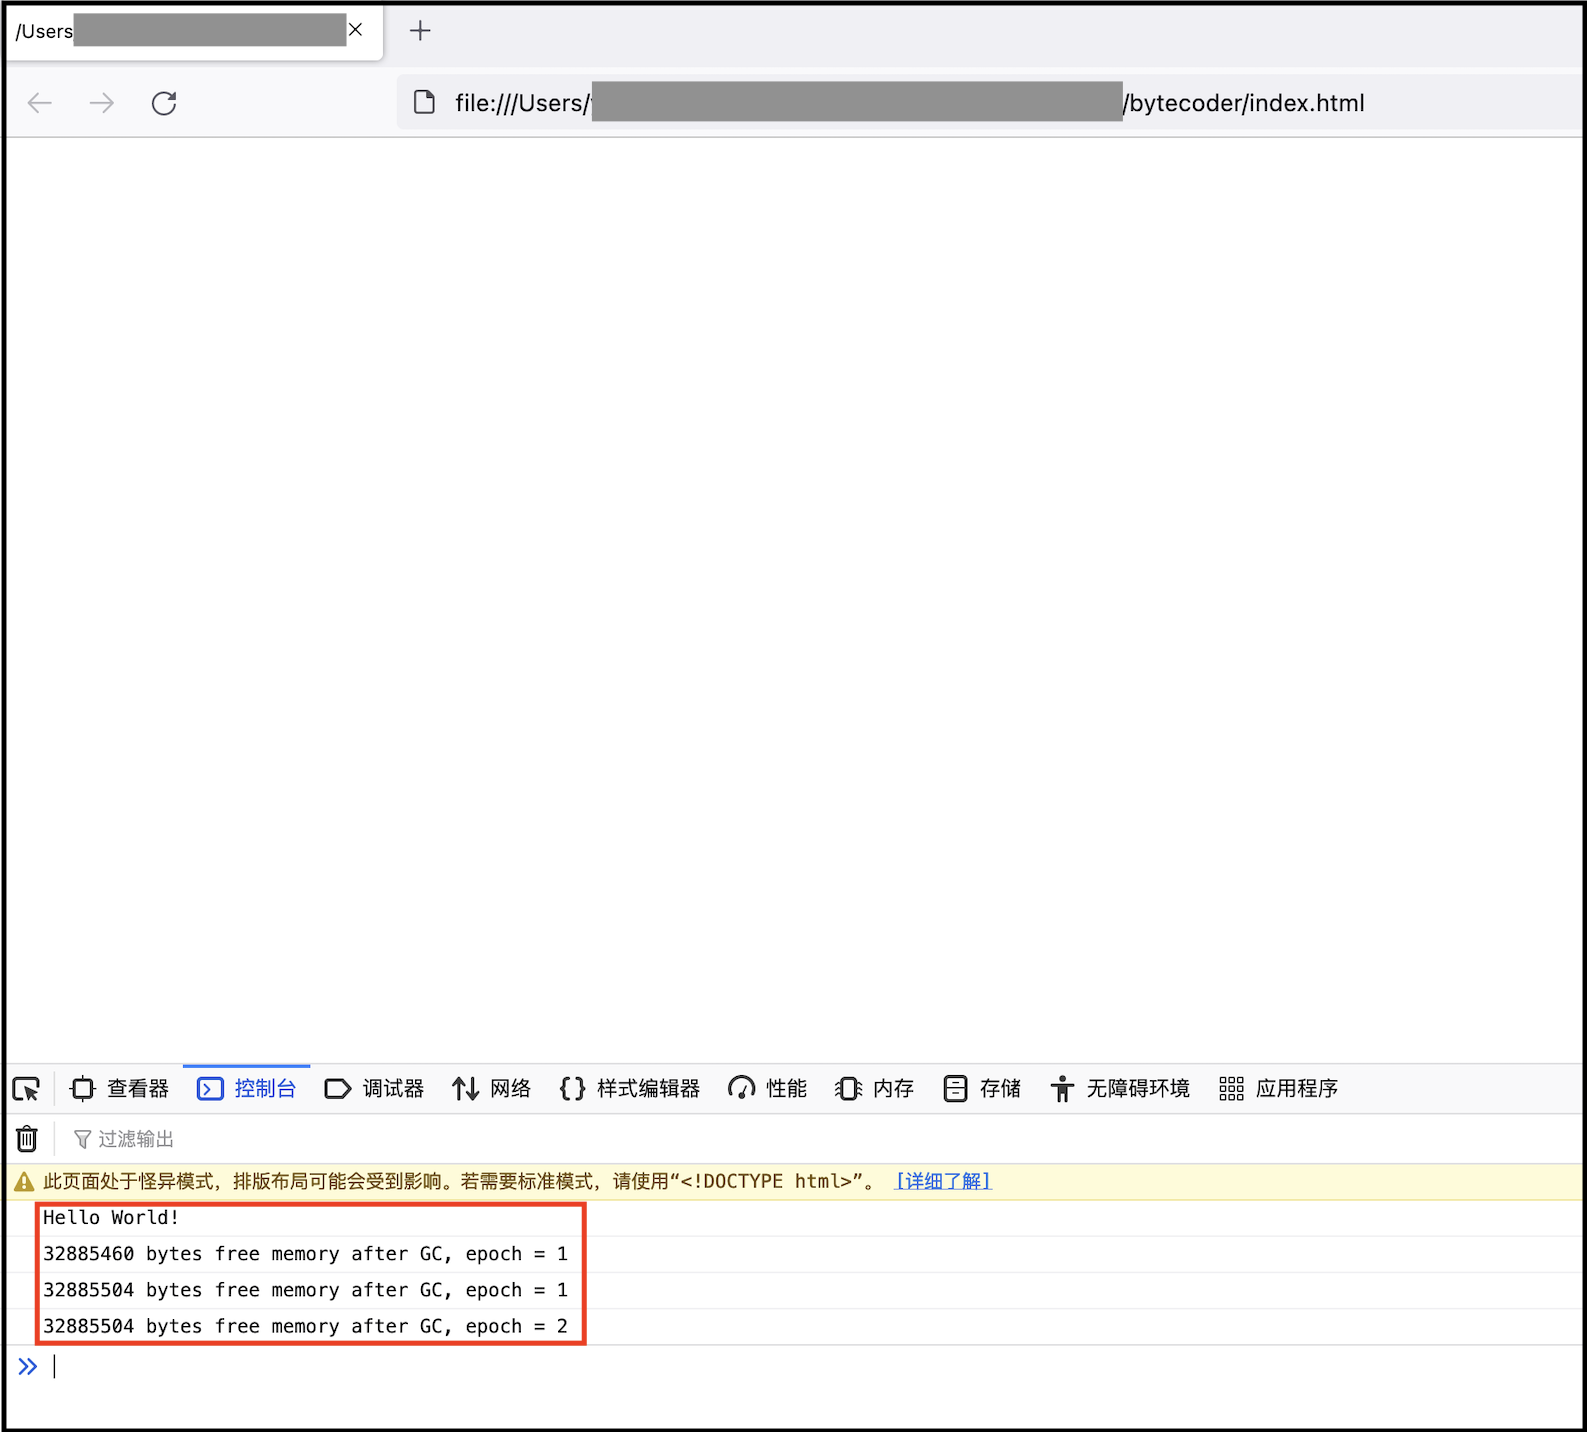
8.2. JWebAssembly测试
JWebAssembly是一个把Java字节码编译成WebAssembly的编译器,目标是用WebAssembly在浏览器中原生地运行Java。
它用.class文件作为输入,输出.wasm文件或.wat文件,生成的WebAssembly代码的大小与原始Java.class文件大小相似。
JWebAssembly编译器要求Java版本在Java SE 8及以上。
不需要编译或者安装JWebAssembly,只需要使用有Gradle支持的Java IDE(如Eclipse,Idea,Netbeans等)。
8.1.1. Export Functions:使Java函数可以被JavaScript的函数访问
必须添加de.inetsoftware.jwebassembly.api.annotation.Export annotation。
示例:
1 | import de.inetsoftware.jwebassembly.api.annotation.Export; |
添加了Export annotation的函数可以被JavaScript调用,函数名会被JavaScript使用,类名和package名不重要。
8.1.2. Import Functions:使Java函数可以访问JavaScript中的函数
必须添加de.inetsoftware.jwebassembly.api.annotation.Import annotation。
1 | import de.inetsoftware.jwebassembly.api.annotation.Import; |
8.1.3. Hello world Sample
1 |
|
参考资料
[1] C in WebAssembly:https://www.fermyon.com/wasm-languages/c-lang
[2] Rust in WebAssembly:https://www.fermyon.com/wasm-languages/rust
[3] Go in WebAssembly:https://www.fermyon.com/wasm-languages/go-lang
[4] JavaScript in WebAssembly:https://www.fermyon.com/wasm-languages/javascript
[5] Python in WebAssembly:https://www.fermyon.com/wasm-languages/python
[6] Java in WebAssembly:https://www.fermyon.com/wasm-languages/java
[7] WebAssembly运行时–Wasmtime:https://segmentfault.com/a/1190000023944392
[8] Compiling a New C/C++ Module to WebAssembly:https://developer.mozilla.org/en-US/docs/WebAssembly/C_to_wasm
[9] How do you set up a local testing server?:https://developer.mozilla.org/en-US/docs/Learn/Common_questions/set_up_a_local_testing_server
[10] Golang WebAssembly:https://binx.io/2022/04/22/golang-webassembly/
[11] Go WebAssembly Github:https://github.com/golang/go/wiki/WebAssembly
[12] Compiling Javascript to wasm:https://www.wasm.builders/gunjan_0307/compiling-javascript-to-wasm-34lk
[13] Quick start with JavaScript on WasmEdge:https://wasmedge.org/book/en/dev/js/quickstart.html
[14] Bytecoder The JVM Bytecode Transpiler:https://mirkosertic.github.io/Bytecoder/chapter-1/page-1-a/