Rust实践:Creating a Chat Server with async Rust and Tokio

1. 创建支持一次通信的Echo Server - Handle One Client

1.1. 项目结构

1
2
3
4
chat-tokio-stream
|-------- src
| |-------- main.rs
|-------- Cargo.toml

1.2. 源文件内容

main.rs内容:

1
2
3
4
5
6
7
8
9
10
11
12
13
14
15
16
17
18
19
20
21
22
23
24
25
26
27
28
29
30
31
32
33
34
35
36
37
38
39
40
41
42
43
44
45
46
47
48
49
50
51
52
53
54
55
56
57
58
59
60
61
62
63
64
65
66
67
68
69
70
71
72
73
use tokio::{net::TcpListener, io::{AsyncReadExt, AsyncWriteExt}};

// `async` turns the main function into an async function.
// By default, Rust has no idea how multiple asynchronous
// computations should be interleaved with each other.
// In order to run async functions (which Rust calls `futures`),
// we need to provide Rust with an executor, a thing that knows
// how to run a future and drive it to completion.
//
// A future is basically a thing that doesn't have a known
// value yet, but may have a known value at some point later
// on down the line. This might be a network read request.
// Let's say an HTTP request. You send an HTTP request to
// get google.com. You're not going to know what comes back
// from that for maybe 100 milliseconds. As soon as you send
// that request immediately, you'll get a future back and
// that future will just be in a pending state where it's
// waiting for the network transaction to complete. And then
// eventually, that network transaction will complete, and your
// future will be in a completed or resolved state.
//
// Rust doesn't know how to run a future by itself (it knows
// how to generate futures. It's great at generating futures
// but it does not know how to execute a future).
//
// The way we can fix this is by adding a procedure macro
// that's available from tokio called `tokio::main`.
//
// With the `tokio::main` procedure macro provided by tokio,
// we can wrap the main function in tokio main. It takes our
// async funtion and turns it into a normal main function with
// some tokio stuff inside of it. This saves us a little bit
// boilerplate code writing.
#[tokio::main]
async fn main() {
// A TCP listener.
// It's going to sit there and listen for incoming connect requests on the port.
// `bind` returns a `impl Future<Output = Result<TcpListener, Error>>`.
// In order to get this Result, which is inside of the future, we need to use `.await`.
// `await` is a Rust keyword that tells the Rust compiler that when you get to this point,
// you're allowed to suspend this function until this future, which is on the left side
// of `await`, resolves and is ready, and has an item that's available to do some processing on.
// `await`: suspend current task until our future is ready to be acted on.
// Now listener has a type Result<TcpListener, Error>, meaning we are getting that Result
// inside future.
let listener = TcpListener::bind("localhost:8080").await.unwrap();

// call the `accept` method on our TCP listener.
// `accept` accepts a new connection from a TCP listener, and yields the
// connection (TcpStream) as well as the address of the connection (SocketAddr).
// Similar to `bind`, `accept` returns a future, and that future outputs a Result.
// Since we're not going to use the address now, we can add an underscore `_` to
// the beginning of the variable name. Then we won't get "unused" warnings from Rust.
let (mut socket, _addr) = listener.accept().await.unwrap();

// we want to read some new data into memory from a network stream,
// so we need a little buffer to put the data into.
let mut buffer = [0u8; 1024];

// It's going to suspend the execution until the read has finished.
// `read` returns the number of bytes that's been read.
// In order to use `read`, we need to import `AsyncReadExt` trait.
let bytes_read = socket.read(&mut buffer).await.unwrap();

// Send the exact same contents obtained from the client back to the client.
// `write_all` doesn't write a message to every socket that's connected to a TCP listener.
// Instead, it writes every single byte that is in the input buffer out onto the
// output buffer.
// We write to our `buffer` up to the number of bytes `bytes_read` that's been read.
// Similar to ReadExt trait, there's a WriteExt trait that needs to be imported
// in order to get `write_all` to work.
socket.write_all(&buffer[..bytes_read]).await.unwrap();
}

Cargo.toml内容:

1
2
3
4
5
6
7
8
9
[package]
name = "chat-tokio-stream"
version = "0.1.0"
edition = "2021"

# See more keys and their definitions at https://doc.rust-lang.org/cargo/reference/manifest.html

[dependencies]
tokio = { version = "1", features = ["full"] }

1.3. 测试

  1. 安装telnet
    对于macOS,使用brew安装telnet

    1
    brew install telnet
  2. 运行该项目

    1
    cargo run

    将在本地(localhost)的8080端口接收TCP连接。

  3. 使用telnet进行测试

    1
    2
    3
    4
    5
    # 连接本地的 localhost:8080
    telnet localhost 8080

    # 建立连接后,发送消息,如`hello!`,会看到本地server返回一个`hello!`
    hello!

    测试结果:
    tokio-chat-server单次连接测试

    tokio-chat-server单次连接返回hello

可以看到,一次通信结束后,server shut down了。

2. 创建支持多次通信的Echo Server - Handle One Client

2.1. 源文件内容

main.rs内容:

1
2
3
4
5
6
7
8
9
10
11
12
13
14
15
16
17
18
19
20
21
22
23
24
25
26
27
28
29
30
31
32
33
34
35
36
37
38
39
40
41
42
43
44
45
46
47
48
49
50
51
52
53
54
55
56
57
58
59
60
61
62
use tokio::{net::TcpListener, io::{AsyncWriteExt, BufReader, AsyncBufReadExt}};

#[tokio::main]
async fn main() {
let listener = TcpListener::bind("localhost:8080").await.unwrap();

let (mut socket, _addr) = listener.accept().await.unwrap();

// tokio has this `split` method which allows uo to separate the read
// part and the write part so that we can handle them independently.
let (reader, mut writer) = socket.split();

// tokio has a very helpful type in it for doing IO operations,
// which is called `BufReader`.
// `BufReader` works the same as the `BufReader` type in the
// standard library.
// It wraps any kind of reader. It maintains its own buffer, and it
// allows you to do some higher level read operations. For example,
// read an entire line of text from a stream.
// The `reader` and `line` creation should be moved out of the loop,
// because we're trying to move the `socket` into the `BufReader`.
// We cannot move something in a loop because there's only one thing
// to be moved.
// `reader` will take the ownership of `socket`.
// Instead of using:
// let mut reader = BufReader::new(socket);
//, we'll pass the read half to the BufReader.
let mut reader = BufReader::new(reader);


// we need a string to store each line.
let mut line = String::new();

// Make the server supports multiple messages sent at a time.
// This can be achieved by adding an infinite loop.
loop {
// Instead of calling `socket.read`, we're going to call `reader.read_line()`
// We need to import `AsyncBufReadExt` trait.
// `read_line` actually appends to the buffer without clearing out
// the input buffer. For example, we you send `hello` for the first time,
// our server will return "hello!"; then you send `world`, instead of getting
// `world`, you'll get `hello!\nworld`.
let bytes_read = reader.read_line(&mut line).await.unwrap();

if bytes_read == 0 { // the reader has reached the end of the file
break;
}

// Instead of passing `&buffer`, we're going to pass `&line.as_bytes()`,
// which will give us the underlying bytes from our string.
// We can no longer use:
// socket.write_all(line.as_bytes()).await.unwrap();
// because this is a borrow of the moved value `socket` (reader has
// taken ownership of `socket`, so we cannot use `socket` outside `reader`).
// This can be resolved by using the `split` method on a socket.
writer.write_all(line.as_bytes()).await.unwrap();

// Clear the buffer, so clients won't get previously sent messages each time
// they communicate with our server.
line.clear();
}
}

Cargo.toml文件不变。

2.2. 测试

  1. 运行该项目

    1
    cargo run

    将在本地(localhost)的8080端口接收TCP连接。

  2. 使用telnet进行测试

    1
    2
    3
    4
    5
    6
    7
    8
    # 连接本地的 localhost:8080
    telnet localhost 8080

    # 建立连接后,发送消息,如`hello!`,会看到本地server返回一个`hello!`
    hello!

    # 可以继续发送消息,本地server会返回相同内容,直到client断开连接
    world

测试结果:
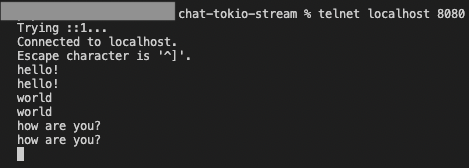
单个client多次通信测试

client断开连接后,server退出

3. 创建支持多次通信的Echo Server - Handle Multiple Clients

3.1. 源文件内容

main.rs内容:

1
2
3
4
5
6
7
8
9
10
11
12
13
14
15
16
17
18
19
20
21
22
23
24
25
26
27
28
29
30
31
32
33
34
35
36
37
38
39
40
use tokio::{
io::{AsyncBufReadExt, AsyncWriteExt, BufReader},
net::TcpListener,
};

#[tokio::main]
async fn main() {
let listener = TcpListener::bind("localhost:8080").await.unwrap();

loop { // infinite loop for handling multiple clients
// every iteration, it calls `accept` to allow a new client to have access to our server
let (mut socket, _addr) = listener.accept().await.unwrap();

// use `tokio::spawn` to create new tasks.
// wrap all of our handling of an individual client in `tokio::spawn`,
// which moves all of one client's handling onto its own independent task.
// We also add this new thing `async move`. This is an async block, which
// wraps up one little piece of code into its own future, i.e. it's own unit
// of async work, so we don't need to write this as a separate function.
tokio::spawn(async move {
let (reader, mut writer) = socket.split();

let mut reader = BufReader::new(reader);

let mut line = String::new();

loop {
let bytes_read = reader.read_line(&mut line).await.unwrap();

if bytes_read == 0 {
break;
}

writer.write_all(line.as_bytes()).await.unwrap();

line.clear();
}
});
}
}

Cargo.toml文件不变。

3.2. 测试

  1. 运行该项目

    1
    cargo run

    将在本地(localhost)的8080端口接收TCP连接。

  2. 使用telnet进行测试

    1
    2
    3
    4
    5
    6
    7
    8
    # 打开1个终端,连接本地的 localhost:8080
    telnet localhost 8080

    # 建立连接后,发送消息,如`hello!`,会看到本地server返回一个`hello!`
    hello!

    # 打开第2个终端,如上连接本地的 localhost:8080,发送消息
    world

    可以看到两个clients都能收到server返回的消息。

    测试结果:
    多用户支持

4. 将Echo Server变成Chat Server

逻辑问题预警!

4.1. 源文件内容

main.rs内容:

1
2
3
4
5
6
7
8
9
10
11
12
13
14
15
16
17
18
19
20
21
22
23
24
25
26
27
28
29
30
31
32
33
34
35
36
37
38
39
40
41
42
43
44
45
46
47
48
49
50
51
52
53
54
55
56
57
58
59
60
61
62
63
64
65
use tokio::{
io::{AsyncBufReadExt, AsyncWriteExt, BufReader},
net::TcpListener, sync::broadcast,
};

#[tokio::main]
async fn main() {
let listener = TcpListener::bind("localhost:8080").await.unwrap();

// tokio's broadcast channel, which allows multiple producers and multiple consumers
// to all send and receive on a single channel.
// `channel` takes a single argument (in the following case it's "10") which is the
// number of items it can keep in its internal queue for the receiver.
// `channel` has a type parameter on it (generic type <T> where T : Clone) so it can
// support any type of thing that is clonable, sendable and sync.
let (tx, _rx) = broadcast::channel::<String>(10);

loop {
let (mut socket, _addr) = listener.accept().await.unwrap();

let tx = tx.clone();

// the way of getting a new receiver is by pulling it out of the sender.
// We also need to declare rx as `mut`, otherwise we'll get "cannot borrow `rx` as mutable,
// as it is not declared as mutable" compiler error.
let mut rx = tx.subscribe();

tokio::spawn(async move {
let (reader, mut writer) = socket.split();

let mut reader = BufReader::new(reader);

let mut line = String::new();

loop {
// in order to build a real chat server, `line` that's read from one client
// should be written out to every single client who is connected.
// The way we're doing this is by using a type provided by tokio, called
// broadcast channel.
let bytes_read = reader.read_line(&mut line).await.unwrap();

if bytes_read == 0 {
break;
}

// This is how we're going to use the channel.
// After we have read the line, we add in a call to `tx.send()`.
// If we directly use `tx.send(line.clone());`, we'll get compiler error of
// "use of moved value: `tx`". That's because we defined `tx` outside the loop
// but trying to use it inside the loop. The way we gets around that is by
// cloning `tx`.
// Now we're able to send items on the channel.
tx.send(line.clone()).unwrap();

// Similar to how we're cloning `tx`, we need to have a new value for the receiver
// on every single iteration of this loop.
let msg = rx.recv().await.unwrap();

writer.write_all(msg.as_bytes()).await.unwrap();

line.clear();
}
});
}
}

Cargo.toml文件不变。

4.2. 测试

  1. 运行该项目

    1
    cargo run

    将在本地(localhost)的8080端口接收TCP连接。

  2. 使用telnet进行测试

    1
    2
    3
    4
    5
    6
    7
    8
    9
    10
    11
    # 打开2个终端,均连接本地的 localhost:8080
    telnet localhost 8080

    # 建立连接后,使用其中一个终端发送消息,如`how are you?`
    how are you?
    # 结果只有第1个终端出现`how are you?`,第2个终端没有出现`how are you?`的消息。

    # 如果使用第2个终端发送`I'm great!`,可以看到第2个终端先显示`I'm great!`,
    # 然后才出现`how are you?`的消息。
    I'm great!
    how are you?

    测试结果:
    chat server逻辑有误

4.3. 分析

main.rs

1
2
3
4
5
6
7
8
9
10
11
12
13
14
15
16
17
18
19
20
21
22
23
24
25
26
27
28
29
30
31
32
33
34
35
36
37
38
39
40
41
42
43
44
45
46
47
48
49
50
51
52
53
54
55
56
57
58
use tokio::{
io::{AsyncBufReadExt, AsyncWriteExt, BufReader},
net::TcpListener, sync::broadcast,
};

#[tokio::main]
async fn main() {
let listener = TcpListener::bind("localhost:8080").await.unwrap();

let (tx, _rx) = broadcast::channel::<String>(10);

loop {
let (mut socket, _addr) = listener.accept().await.unwrap();

let tx = tx.clone();

let mut rx = tx.subscribe();

tokio::spawn(async move {
let (reader, mut writer) = socket.split();

let mut reader = BufReader::new(reader);

let mut line = String::new();

// logic:
// - read the message sent by a client
// - put the message on the queue (channel)
// - read from the same queue you just put a thing on
// (where you may get the message sent by other clients)
// - write that message to all clients
//
// `reader.read_line` and `rx.recv()` are both async functions that could block
// an arbitrary amount of time. We don't want them to be dependent on each other.
// We want to run these two things concurrently with each other.
loop {
// Here, we're saying: read a line from the client, block until you're done reading.
let bytes_read = reader.read_line(&mut line).await.unwrap();

if bytes_read == 0 {
break;
}

// After you've read the line, put something on this queue (the channel)
tx.send(line.clone()).unwrap();

// After (sequentially after) you put something on the channel, read something
// off the channel.
let msg = rx.recv().await.unwrap();

// Send what you've read to the clients.
writer.write_all(msg.as_bytes()).await.unwrap();

line.clear();
}
});
}
}

5. 异步处理消息的Chat Server

5.1. 源文件内容

main.rs内容:

1
2
3
4
5
6
7
8
9
10
11
12
13
14
15
16
17
18
19
20
21
22
23
24
25
26
27
28
29
30
31
32
33
34
35
36
37
38
39
40
41
42
43
44
45
46
47
48
49
50
51
52
53
54
55
56
57
use tokio::{
io::{AsyncBufReadExt, AsyncWriteExt, BufReader},
net::TcpListener, sync::broadcast,
};

#[tokio::main]
async fn main() {
let listener = TcpListener::bind("localhost:8080").await.unwrap();

let (tx, _rx) = broadcast::channel::<String>(10);

loop {
let (mut socket, _addr) = listener.accept().await.unwrap();

let tx = tx.clone();

let mut rx = tx.subscribe();

tokio::spawn(async move {
let (reader, mut writer) = socket.split();

let mut reader = BufReader::new(reader);

let mut line = String::new();

loop {
// use tokio macro called `select`. It allows you to run multiple asynchronous
// things concurrently at the same time, and act on the first one that comes
// back with a result.
tokio::select! {
// you give it an identifier, a future, and a block of code.
// It will:
// - run the future (`reader.read_line`);
// - assign the result of the future to the identifier `result`;
// - then run the block of code inside `{}`
result = reader.read_line(&mut line) => {
if result.unwrap() == 0 { // number of bytes read is 0
break;
}

tx.send(line.clone()).unwrap();
line.clear();
}

result = rx.recv() => {
// we won't do `await` on the future (`rx.recv()`) because
// `select` will do `await` on the future implicitly as a part of
// the compiler machinery it generates.
let msg = result.unwrap();

writer.write_all(msg.as_bytes()).await.unwrap();
}
}
}
});
}
}

5.2. 测试

  1. 运行该项目

    1
    cargo run

    将在本地(localhost)的8080端口接收TCP连接。

  2. 使用telnet进行测试

    1
    2
    3
    4
    5
    6
    7
    8
    9
    # 打开2个终端,均连接本地的 localhost:8080
    telnet localhost 8080

    # 建立连接后,使用其中一个终端发送消息,如`how are you?`
    how are you?

    # 两个终端都会接收到`how are you?`这个消息。
    # 使用第2个终端发送`I'm great!`,可以看到两个终端都会显示`I'm great!`
    I'm great!

    测试结果:
    异步处理消息的chat server

6. 添加feature:不向发送消息的Client发送他自己的消息

可以看到,上面的Chat Server在收到一个client发送的消息后,会向所有clients广播这个消息,包括消息的发送者。

这里,我们想要改进这一点:只向消息发送者之外的人广播这条消息,而消息发送者不会再次收到自己刚刚发的消息。

6.1. 源文件代码

main.rs内容:

1
2
3
4
5
6
7
8
9
10
11
12
13
14
15
16
17
18
19
20
21
22
23
24
25
26
27
28
29
30
31
32
33
34
35
36
37
38
39
40
41
42
43
44
45
46
47
48
49
50
51
52
53
54
55
56
use tokio::{
io::{AsyncBufReadExt, AsyncWriteExt, BufReader},
net::TcpListener,
sync::broadcast,
};

#[tokio::main]
async fn main() {
let listener = TcpListener::bind("localhost:8080").await.unwrap();

// take the `::<String>` after `channel` off, because we're now haveing a tuple of (String, SocketAddr),
// instead of just a String.
let (tx, _rx) = broadcast::channel(10);

loop {
// use the client address to avoid sending message to the message sender.
let (mut socket, addr) = listener.accept().await.unwrap();

let tx = tx.clone();

let mut rx = tx.subscribe();

tokio::spawn(async move {
let (reader, mut writer) = socket.split();

let mut reader = BufReader::new(reader);

let mut line = String::new();

loop {
tokio::select! {
result = reader.read_line(&mut line) => {
if result.unwrap() == 0 {
break;
}

// we're now sending a tuple (String, SocketAddr) instead of just String.
tx.send((line.clone(), addr)).unwrap();
line.clear();
}

result = rx.recv() => {
let (msg, other_addr) = result.unwrap();

// `addr` is the address of current client. If the address of
// the message sender (other_addr) is not current client, write this
// message to current client.
if addr != other_addr {
writer.write_all(msg.as_bytes()).await.unwrap();
}
}
}
}
});
}
}

6.2. 测试

  1. 运行该项目

    1
    cargo run

    将在本地(localhost)的8080端口接收TCP连接。

  2. 使用telnet进行测试

    1
    2
    3
    4
    5
    6
    7
    8
    9
    # 打开2个终端,均连接本地的 localhost:8080
    telnet localhost 8080

    # 使用其中一个终端发送消息,如`how are you?`
    how are you?

    # 只有另一终端会接收到`how are you?`这个消息。
    # 使用第2个终端发送`I'm great!`,可以看到只有第1个终端都会收到`I'm great!`
    I'm great!

    测试结果:
    chat server优化:不发送消息给自己

7. tokio::spawn vs. tokio::select!

tokio::spawn and tokio::select! are two different ways to do concurrency. How do we know when to use which?

tokio::select! is very useful when you have things that need to operate on the same shared state, and you have a finite number of things.

  • For example, in this chat server, we have exactly two async tasks that need to run concurrently: reading a line from a network and receiving on this internal broadcast channel in memory.
    These are the only two things that are ever going to need to run concurrently within the scope of this one task.

  • In addition to finite number of things, we also have some shared state. We did a split on the socket (socket.split()). If we look at the type that we get back from split:

    1
    pub fn split<'a>(&'a mut self) -> (ReadHalf<'a>, WriteHalf<'a>)

    we have a ReadHalf<'a> and a WriteHalf<'a>. You may notice that both of them have lifetime parameters 'a that’s matched up with a mutable borrow of the TcpStream, which is &'a mut self in the above signature. If we go to their definitions, we’ll find that ReadHalf and WriteHalf are implemented just as references to the TcpStream:

    1
    2
    pub struct ReadHalf<'a>(&'a TcpStream);
    pub struct WriteHalf<'a>(&'a TcpStream);

    So if we try to use spawn on these two things as indenpendent tokio tasks, we would run into a problem, because we’ll be trying to split a reference across multiple tasks, which is not allowed. Everytime you call tokio::spawn, everything you pass to it has to be static:

    1
    2
    3
    4
    pub fn spawn<T>(task: T) -> JoinHandler<T::Output>
    where
    T: Future + Send + 'static,
    T::Output: Send + 'static,

    If we change the code to use tokio::spawn instead of tokio::select!:

    1
    2
    3
    4
    5
    6
    7
    8
    9
    10
    11
    12
    13
    14
    15
    16
    17
    18
    19
    20
    21
    22
    23
    24
    25
    26
    27
    28
    29
    30
    31
    32
    33
    34
    35
    36
    37
    38
    39
    40
    41
    42
    43
    loop {
    let (mut socket, addr) = listener.accept().await.unwrap();

    let tx = tx.clone();

    let mut rx = tx.subscribe();

    tokio::spawn(async move {
    let (reader, mut writer) = socket.split();

    let mut reader = BufReader::new(reader);

    let mut line = String::new();

    // `tokio::spawn` is used here!
    tokio::spawn(async move {
    reader.read_line(&mut line).await.unwrap();
    });

    tx.send(("".to_string(), addr)).unwrap();

    loop {
    tokio::select! {
    // result = reader.read_line(&mut line) => {
    // if result.unwrap() == 0 {
    // break;
    // }

    // tx.send((line.clone(), addr)).unwrap();
    // line.clear();
    // }

    result = rx.recv() => {
    let (msg, other_addr) = result.unwrap();

    if addr != other_addr {
    writer.write_all(msg.as_bytes()).await.unwrap();
    }
    }
    }
    }
    });
    }

    We’ll now get the error of “socket does not live long enough”. That’s because we’re calling the function reader.read_line, which needs the reference to the socket to be a static reference. But now it’s not a static reference. So because of the way split works, we do have some shared state between the two branches (reader and writer both point to the same underlying piece of memory).

  • It’s very common in writing programs with tokio that a select statement has five or six branches on it, and they are all just gathering messages from different channels, and then altering some shared state like error counters or something like the above.

  • Besides, in select, branches can operate at the same time as each other (like the read_line and recv shown in previous sections). However, as soon as it jumps into one of the blocks, that’ll be the only thing that’s running (it will suspend other branches).

  • Another benefit you can get from select is that because it all happens on the same task, you can easily share references among all the different branches of select. It just makes memory management a lot easier. You don’t need to worry about making everything owned, or making everything static, or sync and all these stuff.